What comes next

So it’s been a very hot minute. Like a multiple year long hot minute. Like a i’m-now-25, have-also-experienced-a-pandemic-and-four-years-of-grad-school hot minute.

You must be wondering: what have I been up to?

It’s not that I don’t cook and bake anymore, it’s that I don’t have the patience for following or recording recipes, nor for taking elaborate photos of my food before diving in, all of which are prerequisites for running a food blog. I also don’t have the patience for making videos of me cooking, nor for uploading said photos and videos to instagram, pinterest, foodgawker, and the rest.

All in all, I still love the act of cooking but as I grow older and my time more precious, the auxiliary parts of food blogging have become a sort of chore.

Here’s what I’ve been interested in and cooking recently:

  • Air fried chocolate chips. You heard it here first: air fried chocolate chips (3-4 minutes at 350 degrees) are the best thing you never knew you needed. I was inspired by the chocolate chips at the top of banana bread or cookies. They always seemed creamier and more fudge-like than chips straight out of the bag. By air frying or baking them, you’re essentially doing 2 things: caramelizing the sugar around their exterior and untempering the chocolate. The result is fudge morsels.
  • Vegan eclairs, or more specifically: Vegan pudding cream. 1 packet of whole food vanilla instant pudding + 1 cup of oat milk. Then fold in 1 carton of whole foods (defrosted) vegan whip. The result is the simplest vegan vanilla cream you could imagine. It’s just as good stuffed inside of cupcakes as piped inside of vegan cream puffs or in between two layers of cake. The eclair shell is still a work in progress, but JustEgg is helping me get there.
  • Chipotle. Okay, so I’m not actually cooking chipotle, but I sure as heck have perfected my order. Rice bowl with white rice, half and half beans, fajita veggies, guac on the side, corn salsa, light pico, romaine, tortilla on the side, and a side of chips. Then you make a burrito with the tortilla and half of the bowl, and save the other half to eat with chips the next day. It’s the ultimately bang for your buck (in terms of chipotle, of course).
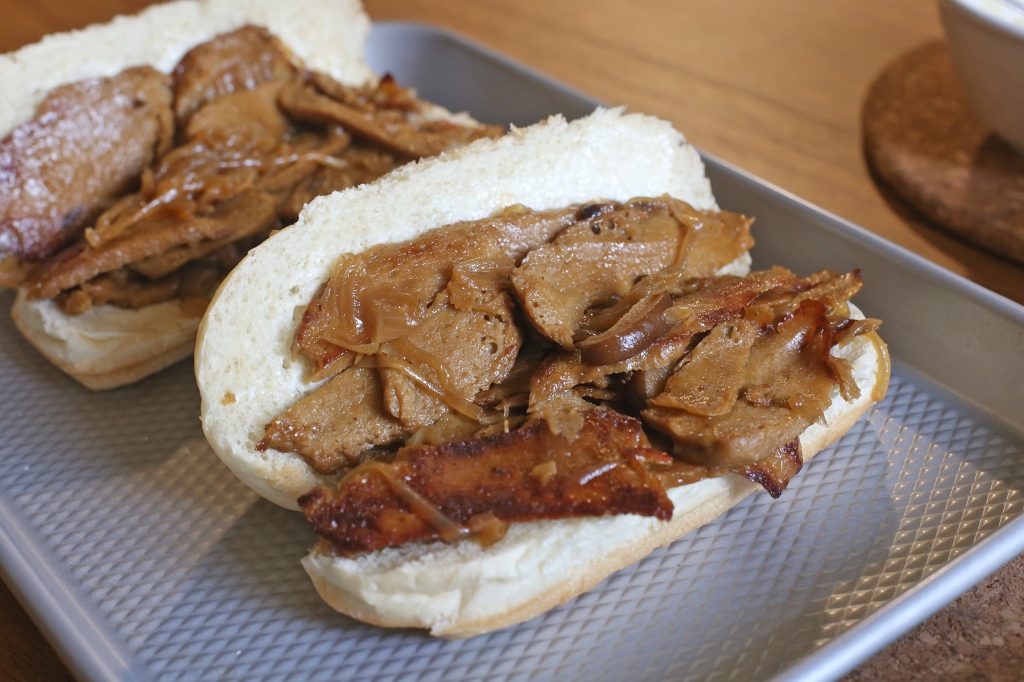
  • Washed flour seitan. For about a year, i’ve been on a facebook page related to seitan made with flour rather than vital wheat gluten. The results have been amazing the few times i’ve tried it, but it’s a bit of a process. I’d like to get more into this.

Okay, but what have I been up to? (Besides grad school, of course).

  • Luke and I have a dog now! Her name is Tuzi, she’s a miniature poodle, and she was rescued from the dog meat trade in china. You can check her out here on instagram. She’s a total goof.
  • I’ve been buying and selling a lot of clothes. In the past few years, I’ve gotten more interested in fashion than ever before. Even through college, I hardly thought about my clothing or what I was wearing. At most, I had a few favorite items that I thought “looked good”. I discovered thrifting during my first year at grad school, and it has sent me on an adventure through the world of fashion. I’ve bought a lot of new (well, much second-hand) clothing, fallen in and out of love with many of them and begun selling clothing online as a result. I’ve started following some clothing brands that I love, have turned away from some brands I use to wear. My closet is a work in progress, but it’s a fun one.
  • I’ve developed a keen interest in minimalism, while acknowledging that I am not a minimalist, at least when it comes to my wardrobe. I’m trying to be more mindful about my purchases and where they come from, and again this is a work in progress.

And finally, what is next for Chomps of Life?

I’m honestly not sure. Chomps of Life was originally a food blog I started in high school, but my interests have evolved so much since then. “Chomps” was originally an allusion to the act of eating, but in a metaphorical sense, it really just refers to snippets of my life. I’m thinking about writing some clothing reviews because this is something that interests me nowadays. Or maybe I’ll actually record some recipes and get them posted.

I guess we’ll find out together!

vegan banana muffins, take 2

I can’t stop making banana muffins. Since my life is basically a race to finish bananas before they get all brown and spotty, and then a race is use up frozen bananas before our entire freezer is just a banana warehouse, I make a lot of banana muffins.

Sometimes, when I’m feeling wild, I’ll google “vegan banana cookies” or “banana granola”, but I need recipes that use up 3 bananas, not half a banana, so, muffins it is.

Also, I should point out: at this point I should really have a “favorite banana bread” recipe, but there’s this line between healthy and cake-like that I’m still figuring out.

My ideal banana muffin/bread is:

  • Super moist, yet fluffy, almost cakelike
  • Lots of banana flavor, but not too sweet
  • Healthy enough that I can reasonably eat a muffin, or two, for breakfast

This recipe by Hannah Chia, gets really close to being the perfect muffin for me, despite taking some artistic liberties (3 bananas instead of 2, reducing the milk) with the recipe.

The muffins were seriously incredible warm out of the oven, and remained like that for the rest of the day. While still good on day 2 onward, their crust softened, and they became a bit too chewy for me (which I find can happen with oat flour), lending to them a healthier feel. That said, I think that the base recipe is excellent, and that swapping half the oat flour with pastry flour may just do the trick.

I definitely recommend trying this recipe, and as I play around with it, I’ll post updates on what I find. Since I’m so terribly unreliable about posting polished recipes anyway, I figured I should at least document my baking adventures, because that’s fun too.

banana muffins, version 2

Lightly adapted from here. If you only have 2 bananas, definitely check out Hannah’s original recipe.

dry ingredients:

  • 2 1/2 + 1/2 cups rolled oats
  • 1/4 cup walnuts
  • 1/2 cup coconut sugar
  • 1 tsp baking powder
  • 1/2 tsp salt

wet ingredients:

  • 3 medium sized ripe bananas, mashed
  • 1/2 cup oat milk
  • 2 tbsp almond butter + 2 tbsp vegetable oil
  • 2 tbsp ground flax seeds + 4 tbsp water, set aside for 10 minutes
  • 1 tsp vanilla extract
  • 2 tbsp lemon juice
  • 3/4 cup chocolate chips

Preheat oven to 350 degrees and grease or line a 12-muffin muffin tin.

Pulse 2 1/2 cups of rolled oats and walnuts in a food processor or blender until they form a fine meal. Add the coconut sugar, baking powder, and salt, and pulse until combined. Finally, add 1/2 cup rolled oats but don’t

Stir together the mashed bananas, oat milk, almond butter, oil, flax mixture, vanilla extract, and lemon juice.

Fold the dry ingredients into the wet ingredients until no flour streaks remain. Fold in the chocolate chips.

Divide the batter into 12 muffins. Bake for 25-28 minutes, or until their tops are golden brown. Serve while still warm.

easy vegan pesto spread

Today, I wanted to share my formula for making pesto.

I’ve been making pesto ever since high school. Back then I loved super creamy and cheesy pesto, while nowadays I opt for dairy free, but still creamy, renditions.

Even though my taste buds and dietary wants have changed a lot over time, pesto is so versatile that I still used the same basic recipe formula that I did in high school.

To make basil, you’ll want:

  • Greens. Traditionally basil, but a mix of arugula, parsley, mint, kale, and spinach can deepen the flavor of your pesto.
  • Nuts. Traditionally pine nuts, but I usually use cashews because I tend to keep them around more reliably. Other options include almonds, pecans, and walnuts. For a more nutty flavor, chose pecans or walnuts, and to keep the nut flavor mild, pick almonds or cashews. Alternatively, use sunflower seeds if you have a nut allergy!
  • “Cheese”: I say cheese very lightly, because while in the past I would load my pesto up with parmesan, nowadays I use nutritional yeast. This is an optional ingredient and can be omitted, but I like the complexity (umami) it adds.
  • Fat: Traditionally olive oil, which works wonderfully for pasta, but I love using vegan mayo instead. I think it makes the pesto better for spreading on sandwiches and pizza. If I’m feeling lighter pesto, I’ll use avocado. And if I’m feeling even lighter pesto, I’ll omit the fat entirely and use water or frozen peas. Funnily, the sweetness of peas really compliments pesto.
  • Garlic. This one is to taste. I usually use one clove of garlic and a generous sprinkling of garlic powder, though sometimes I’ll just use fresh garlic, or even just powdered if I’m feeling especially lazy.
  • Salt. How you introduce salt is totally up to you, but I personally find that a teaspoon of miso paste plus salt to taste works wonders. Traditional pesto would call for plain sea salt.
  • Acid. This one is optional, but I think a squeeze of lemon juice or teaspoon of vinegar helps brighten pesto.

And then for *my* perfect ratio (feel free to experiment, because it’s seriously hard to mess up):

  • 1 1/2 cup greens
  • 1/4 cup nuts and/or seeds
  • 2 tbsp “cheese”
  • 1 clove garlic
  • salt, to taste
  • 2 tbsp fat (this one is low compared to traditional pesto, but I don’t like super oily sauces. feel free to increase to 1/4 cup if you do!)
  • (optional: 1 tsp acid)

As long as you don’t deviate wildly from this ratio (and honestly, probably even if you do), your pesto will be delicious. The only other equipment you need is a food processor or good ole mortar and pestle (a serious pain in the butt to make, but molecularly superior, maybe), and twenty minutes.

I highly recommend you go pick up some basil (or a basil plant), and try this recipe asap.

easy vegan pesto spread

  • 1 1/2 cups (really) packed greens (i used 1 cup basil, 1/2 cup arugula. other options are kale, spinach, parsley. to get the traditional pesto taste, make sure to use at least 1/2 cup basil)
  • 1/4 cup nuts, I usually use raw cashews, but other options include: pine nuts, almonds, pecans, walnuts, sun flower seeds
  • 1 garlic clove, roughly chopped (+ optional: 1/2 tsp garlic powder)
  • 2 tbsp nutritional yeast
  • 2 tbsp vegan mayo, oil, or avocado. i chose mayo.
  • 1/2-1 tsp salt, to taste. optionally, 1 tsp miso with salt to taste
  • (optional: lemon juice, to taste)
  1. roast the cashews until lightly golden brown, and then set aside to cool. either roast at medium heat on a frying pan, or at 400 degrees for 5-7 minutes. optionally, use an air fryer at 375 for 3 minutes.
  2. add your greens to a colander or strainer, and turn your sink water to as hot as it goes.
  3. quickly rinse the greens with the hot water, essentially ‘blanching’ them. this will prevent your pesto from losing its vibrant green color when you store it. then, turn your water to cold to cool down the green.
  4. shake your greens to dry. try to remove any excess water, but the leaves should still be damp.
  5. add the greens, cashews, garlic, and nutritional yeast to a food processors, and pulse until finely chopped.
  6. add the vegan mayo, and salt to taste, and continue processing until the pesto is as chunky or smooth as you prefer. I like a relatively creamy pesto, with just a touch of texture for sandwiches or pizza sauce, but leave it a bit more chunky when I plan to use it for pasta. if you find the mixture is too thick, thin with more vegan mayo, oil, or water.
  7. to store, refrigerate in a jar or container for up to 5 or so days, or to your own discretion. if it smells and taste alright, it’s probably fine.

vegan strawberry shortcakes

It’s been a few hot seconds, but I’m back and I’m ready to photograph everything that comes out of my kitchen. A few weekends ago I went on a retreat to Ikea and came out with a new Food Photography Table. It was the cheapest table I could find, and I am hyped to put it to use.

Luke and I had some friends over for dinner, a box of strawberries that were starting to look a little old, and about a cup of leftover vegan soy yogurt I made, which is how these strawberry shortcakes came to being.

To make strawberry shortcakes, all you need is self rising flour (or regular flour, baking powder, and salt), sugar, vegan butter, and soy yogurt. Plus whatever toppings you’d like- we choose fresh strawberries and coconut whipped cream from a can, though yogurt, soy custard, or homemade coconut whipped cream would work too.

This recipe is easy enough for beginners to make, but the results are impressive enough to serve at a nice dinner party. Shortcakes are best fresh, but can be toasted for a minute or two to reheat at a late date. They also freeze well.

vegan shortcakes

  • 2 cups self rising flour OR 2 cups all purpose flour + 2 teaspoons baking powder +1/2 teaspoon salt
  • 1 tablespoon sugar
  • 8 tablespoons (1 stick) chilled earth balance buttery sticks, cut into pieces
  • 2/3 cup plus 3 tablespoons soy yogurt
  • 2 tablespoons coarse sugar
  1. combine the self rising flour (or all purpose flour + baking powder + salt) in a large bowl with the sugar. whisk to combine.
  2. using a fork or pastry blender, cut the vegan butter into the dry ingredients until the mixture is sandy and clumps together. Don’t overmix or use your hands, or the butter will melt too much and the shortcakes won’t be as flaky.
  3. stir in the soy yogurt until a sticky dough forms.
  4. divide the dough into 6 portions and gently form into patties on a baking tray lined with parchment paper.
  5. sprinkle the shortcakes with the coarse sugar.
  6. bake at 375 degrees for around 14-20 minutes. The shortcakes should be golden brown around their edges and tops, but pale otherwise.
  7. cool until just barely warm, and then serve with macerated strawberries and coconut whipped cream.

macerated strawberries

  • 1 pound (16 oz) strawberries, sliced
  • 2 tablespoons sugar
  • pinch (1/8 tsp) salt
  1. combine the sliced strawberries, sugar, and pinch of salt.
  2. cover and refrigerate for one hour, or up to 48 hours, before serving. the strawberries will release juice and create a nice sauce as they sit. feel free to add more sugar to taste.

Chocolate Chocolate Cookies (Gf. Vegan.)

Happy new year! While I’m a terribly inconsistent food blogger, I thought I would ring in the new year by finishing a post that I’ve had in my drafts for way too long.

In my own life, 2018 was a year of many changes- most of them positive. I’ve settled into my life in Boston, explored new England, gone fully vegan, moved in with my boyfriend to a new apartment and decorated said apartment, and grown ever the more attached to my parent’s new golden doodle puppy Cara.

I’ve had a lot of fun and happy times with my friends and family and am so grateful for the people I am surrounded with. I’m looking excited for the upcoming year.

I’m pretty comfortable with vegan baking by now, and can whip up most recipes with ease, but vegan gluten free baking is a beast of its own. Many times vegan and gluten free baked good are dry and crumbly but I have had enough good ones to know that it’s possible for them not to be.

While I’m not gluten free, I think that gluten free flours, if used well, can really enhance the taste and texture of baked goods. Almond flour gives these cookies crispy and chewy edges, while keeping the middle nice and soft. It feels like a total contradiction, but you need to trust me- it’s awesome.

I’ve made several batches of these cookies for taste testing, and they are picky eater approved, ehem. So if you’re looking for an easy dessert that satisfies most allergy requirements (well, besides nut-free- sorry hanna!), take note!

Chocolate Chocolate Cookies

  1. To make a flax egg, start by combining the ground flax seeds with 2 1/2 tablespoons of water. Stir and set aside.
  2. Combine the almond flour, cocoa powder, baking soda, salt, and chocolate chips in a bowl.
  3. Meanwhile, add the vegan butter and sugar to a separate bowl and use an electric mixer to whip until light and fluffy. Add the flax egg and vanilla extract and whisk until combined.
  4. Using a spatula, fold the dry ingredients into the wet ingredients until no streaks of flour remain.
  5. Preheat your oven to 350 degrees. Portion out heaping tablespoon sized balls of dough onto a baking sheet lined with parchment paper.
  6. Bake the cookies for 8-10 minutes, or until their centers have just cooked and no longer look raw. Remove from the oven, let cool until the edges start crisping up, about 5 minutes, and then transfer the cookies to a cookie rack to continue cooling.
  7. Serve warm, or save for up to 3 days! The cookies are delicious with a glass of soy milk or crumbled over ice cream.

PB Banana Breakfast Pudding

This recipe requires a little leap of faith, because unless you’ve had tofu pudding before, you’re going to look at the ingredients, scoff, and close the tab. While this is one of those recipes that doesn’t really make sense until you’ve tried it yourself, here are 5 reasons why you should add bananas and tofu to a blender asap:

  1. This pudding is super high in protein and contains no refined sugar. That basically means you can eat it for breakfast or zero with zero hesitation. Heck, a serving of this pudding (1/2 a recipe) contains 16g of protein by itself, meaning it’ll keep you full until your next meal, no problem. If you’re trying to avoid natural sugar in addition to refined sugar, feel free to replace one banana with an avocado or coconut cream.
  2. Bananas + peanut butter is delicious combination, and its chocolate banana pb pudding counterpart is awesome as well. The combination of them together is even better!
  3. Silken tofu keeps the pudding silky smooth. While this pudding contains after notes of soy (which is an extremely subtle, but pleasing flavor imo), it’s dominant flavors are peanut butter and banana. That said, the silken tofu helps give the pudding body.
  4. This pudding a great base to play around with. Want more body? Add 1/2 cup of melted chocolate chips and use one banana (or none) instead of 2. Want a frosty milkshake instead of pudding? Freeze the bananas before blending and proceed with the recipe as follows. You can play around with the recipe, adding canned pumpkin, strawberries, or really anything that sounds good. For a more neutral flavor, try replacing the peanut butter with almond or cashew butter.
  5. It only takes 5 minutes to make, total. This recipe is as easy as blending 3 ingredients. In 5 minutes you could have some delicious pudding for breakfast, a snack, or dessert.

So there you have it, give this recipe a try and let me know what you think below. If you mix up the recipe in any of the ways mentioned above (or any new ways), let me know what you tried!

Banana Peanut Butter Pudding

  1. Combine the silken tofu, bananas, and peanut butter in a blender until smooth.
  2. Remove half the blended pudding and set aside. Add the cocoa powder to the remaining pudding and blend until combined.
  3. Layer the peanut butter pudding and chocolate peanut butter pudding in a clear dish and top with coconut whipped cream and graham cracker crumbs. Enjoy!

Instant Pot Seitan “Philly Cheesesteak”

Seitan is a seriously underrated food, and I’m starting to understand why. For all of its nutritional punch (75g of protein per 100g of seitan, basically a protein shake in delicious food form), it’s not readily available in stores (and when it is, it’s incredibly overpriced), and making it from scratch is daunting.

First of all: What is seitan? Seitan is a meat substitute that is basically steamed bread, just with everything but the protein removed. That might sound scary, but early renditions of seitan were made by soaking and kneading bread in water until only the high protein component remained. Nowadays, you can just buy vital wheat gluten flour, which does most of the work for you.

Because it’s made kind of like bread dough, it’s very easy to season and soaks up a lot of flavor during cooking. Besides that, cooked well it’s tender, chewy, and a great substitute for most meats. I especially like it lightly pan fried so that its edges get crispy, which is a version I’m going to share with you today!

Typically, to cook seitan, you need to steam or boil it for at least an hour. I’ve made it this way a few times in the past, and while it always turns out well, having an instant pot or pressure cooker can greatly accelerate this process. I used my instant pot for all but the last step of this recipe, though I recon you can use is for the entire recipe if you only want to dirty one pot total.

While this recipe is for a “philly cheesesteak” (all in quotes because it contains neither cheese nor steak…oh and I’ve never actually tried a philly cheesesteak (but I can promise regardless of authenticity that you will love it)), I want you to dream bigger!

At the heart of it, this recipe contains a method for easily cooking seitan in an instant pot. What the seitan is used for is completely up to you! Glaze it with terriyaki and serve it with sushi rice? Japanese(ish) terriyaki “beef’. Brine it in a beet and vinegar mixture? It’s reuben time! Add it to curry? Delicious vegan beef curry. If you’ve noticed, I’ve used it as beef in all of the substitutions, and I think that works well because of it’s amber color. I have yet to make “chicken” seitan, but you betcha that’s next.

Generally when you make seitan, you cook it by boiling it in broth, which in this case of the instant pot means pressure cooking it in broth. The leftover broth can be reused in any recipe calling for broth, but in the case of these sandwiches, I add sliced onions and a dash of maple syrup and reduce it down to a thick jam which is used to glaze the seitan slices. Seriously delicious.

One of the complaints I’ve heard about seitan is that it can be dry, which is a totally valid observation. I’m not a huge proponent of serving seitan plain, but a little sauce or glaze can make all the difference. By itself, you’re probably never going to mistake it for meat, but it fills the niche wonderfully.

As a side note, I’ve met various people who’ve asked “why do vegans try to replicate meat/eggs/milk? If they’re vegan, shouldn’t they just stick with naturally vegan foods?”. I can’t speak for all people who eat vegan, but I do think this question is important nevertheless. My answer is, in general, people don’t become vegan because they don’t like the taste of meat, they made the transition to a plant based diet for ethical, and/or environmental, reasons. For people who are used to eating meat at most meals, meat substitutes can fill the same niche that other plant based protein sources don’t emulate as well.

The last part of the philly cheesesteak–the cheese–is a recipe I’m still playing around with and hope to share soon. It’s a deliciously gooey mozzarella based off of this recipe. While my rendition is still a work in progress, in the meanwhile I highly recommend Violife or Chao cheese slices. While Violife melts the best, is only available in select stores in the US, so Chao or Daiya are good as well. And if you’re trying to avoid cheese substitutes altogether, this sandwich is also truly delicious without it. I’m a total sucker for the taste and texture of caramelized seitan, and this recipe really hits the mark.

Luke and I both loved this recipe (we made it once, exclaimed “oh my god, so good”, and prompted made it again the next weekend) so I hope you will too! He had never made seitan before, and I had only made it a few times in the past using the traditional boiling method, I think both of us were surprised by how easily the recipe came together.

While I think both Luke and I could eat these sandwiches for every (and any) meal, we also decided to use some of the seitan and gooey mozzarella to make “steak” pizza, and wow, what a great decision that was. While we ate that pizza too fast to photograph, I’m definitely planning to make it again so that I can share the recipe.

I hope you’ll try out this recipe and let me know what you think!

P.S. I think I’ve posted way too many chocolate chip cookies already, but last weekend I was in New York and tried a chocolate chip pecan cookie at By Chloe. It was so good that as soon as I got home, I immediately started googling copycat recipes. Hopefully I’ll have perfected and be able to share that one soon!

Seitan “Cheese”steaks

I find this recipe makes the perfect amount of food for 2 people (4 servings total), but I would double if you’re serving more than 3 hungry people, or, if you’re using a 6 quart instant pot. I used my 3 quart (smaller) instant pot for this recipe. Also, having an instant pot speeds up the seitan cooktime, but is by no means necessary!


Seitan

Cooking broth (double if using a 6 quart instapot)

Caramelized Onions

Sautéed Peppers and Mushrooms

For Serving

  1. In a bowl, combine all the seitan ingredients besides the vital wheat gluten.
  2. Add the vital wheat gluten and stir together with a spoon until a ball of dough forms.

3. Knead the vital wheat gluten for about 3-5 minutes, or until feels dense and is not sticky to the touch. Shape into an oval, and set aside while you prepare its broth.

4. Set your instant pot to “sauteé” and add the broth ingredients. I used my 3 quart instantpot and found 3 cups of liquid was perfect, however I would double the broth ingredients if using the regular 6 quart size. The liquid won’t completely submerge the seitan ball, but that’s alright.

5. Set your instant pot to “manual” or “pressure cook” (identical settings) for 25 minutes. Allow it to natural release for 10 minutes (let it relax for 10 minutes after the 25 minute timer finishes), and then quick release any remaining pressure. Remove the seitan from the broth and set aside to cool. Once no longer hot, set aside and cover with plastic wrap to prevent it from drying out. Note: If you don’t have an instapot, boil the seitan in a covered pan for 1 hour, flipping occassionally. The rest of the recipe is the same.

6. If you doubled the broth recipe, measure out 2 cups to keep in the instant pot. Any excess can be used for any recipe calling for vegetable broth.

7. Add the onion, shiitake mushrooms, and maple syrup to the instant pot. Set to “sauteé” and cook until the onions are thick and jam-like, and nearly all the liquid has evaporated. This step took 35 minutes for me, but for the most part I only had to stir it towards the end.

8. Remove the reduced onion mixture from the instant pot and set aside.

9. Add a tablespoon of oil into the instant pot, and add the sliced crimini mushrooms. Cook until no longer watery.

10 .Add the red bell pepper, and continue cooking until soft. Set the mushroom and bell peppers aside.

11. Cut the seitan into thin slices. In this case, the thinner the better. I used a sharp knife to achieve this but I’m curious if a mandolin might also work.

12. In a large sauce pan (alternatively, you can use the instantpot, but I wanted a larger cooking surface), heat up 2 tablespoons of oil. Fry the seitan slices until their edges are brown and crispy.

13. Add the reduced onion mixture to the seitan slices, and continue cooking until the slices are well glazed.

14. To serve, spread the hoagie buns with a thin layer of vegan mayonnaise. If desired, broil for a minute or two to toast. Top with seitan pieces, bell peppers and mushrooms, and a slice or drizzle of vegan cheese. I used a vegan mozzarella recipe that I will share soon!

15. Take a big bite, sigh contentedly, and enjoy!

Quick Vegan Banana Muffins

I’ve gotten into the habit of eating pretty much the same thing for breakfast every week day. A bowl of heritage oat flakes topped with drippy natural peanut butter and almond or oat milk*. With a latte on the side, of course.

*Speaking of oat milk, I’ve been looking for Oatly, a popular European brand oat milk, for months, and it’s finally arrived to the East Coast! It’s lived up to all my expectations, and I’m stocking up until I’m positive it’s here to stay. It’s free of any added sugar or artificial sweeteners (besides the natural sugars found in oats, which gives it a mild, but not cloying, sweetness), and is super creamy. I love it in cereal, in coffee, or even just plain. I still love the taste of almond milk, but it’s nice knowing that Oatly is better for the environment, and doesn’t have any added sugars. Also, I’ve mixed it half and half with barista soymilk for my lattes, and it still froths up great (there’s an Oatly barista version also, but it’s not readily available yet- I have yet to try frothing up Oatly by itself)! At this point, I’m pretty much a walking commercial for Oatly, but I love the company and hope everyone gives oat milk a try!

While cereal is my breakfast of choice during the weekday, on the weekends Luke and I tend to be a more creative and rotate between avocado toast (typical), pancakes, muffins, or even just leftovers. These muffins are one such example. I started with a basic blueberry muffin recipe from Fuss-free Vegan, which I slightly healthified, by reducing the oil, adding banana, and replacing some of the flour with whole grains. Then I unhealthified it by adding chocolate chips. You win some you lose some.

The result was perfectly tender and flavorful banana muffins that were studded with melty chocolate chips. These muffins were perfect with peanut butter for breakfast or a snack, and warmed in the microwave with a scoop of ice cream for dessert. I tried and loved both.

Give this recipe a try and let me know what you think!

Banana Muffins

Dry Ingredients

Wet Ingredients

Optional Add ins

  1. In a large bowl, whisk together the dry ingredients.
  2. In a separate bowl, whisk together the wet ingredients.
  3. Add the dry ingredients to the wet ingredients and gently whisk together until no streaks of flour remain. Small lumps are fine.
  4. Next, fold in any of the optional add ins.
  5. Divide the batter evenly among 12 muffin wrappers.
  6. Bake at 400 degrees for 15-20 minutes, or until a toothpick inserted into the center comes out clean.
  7. Remove the muffins from the muffin tin, and place on a rack to cool. The muffins are delicious warm, but stick to their muffin wrappers more. Once they sit for a few hours, their wrappers should pull away cleanly.
  8. Enjoy with peanut butter and oat milk!

My Favorite Avocado Toast

As much as I enjoy cooking, cooking every night gets tiring after a while, and since I’m not the kind of person who can eat the same stew for five days in a row, simple dishes like this avocado toast frequent Luke’s and my dinner rotation.

This isn’t the fanciest avocado toast out there– with only 6 ingredients including salt, it’s far from it actually, but it’s full of plant based carbs and fats and proteins, all the good stuff that eating vegan microwave brownies for dinner doesn’t exactly fulfill nutritionally (but hey, they could be way worse).

This is less of a recipe, and more of a compilation of pictures that show the avocado toastin’ process. All you need to make the best (imo) avocado toast is:

  • Bread. I like a hearty bakery bread because you can really taste it in this recipe, but I’ve also made and enjoyed it with grocery store sliced bread.
  • Hummus. This is my “secret” ingredient. Choose any hummus that you like (red pepper, not pictured, ftw) and it’s guaranteed to add a nice flavor a texture.
  • 1/2 avocado per 2 slices of bread. In the picture I have a whole avocado, but that’s because 2 slices of bread were currently toasting.
  • Lemon juice, I use presqueezed lemon juice like a monster.
  • Garlic powder. Technically you could omit, but I have never and would never.
  • Salt.
  • (Optional) Tofurky smoked hickory slices, fake bacon, smokey tempeh or tofu, or any other other kind of seitan or tofu meat substitute that you enjoy. I usually omit this ingredient if I’m making the toast for breakfast, since it gives the meal a more sandwich-y feel
  • Update from 2019 Mia: Trader Joe’s Everything But the Bagel seasoning is sort of life changing, and I highly recommend topping avocado toast with it.

That’s it! That’s all you need for some banging avocado toast.

To make the avocado toast, start by toasting your bread. Next, take your hummus and generously lather it on the bread.

To prep the avocado, I like to cut it in half and remove the pit. If I’m only make 2 slices, I store the half with the pit in a Tupperware until I’m ready to use it. I add a light sprinkling of garlic powder and lemon juice to the avocado half (or halves) I’m using, and then I grab a fork and I smash the avocado until it’s still chunky but no big pieces remain.

Ideally, if I’ve done a good job smashing, I can just use the same fork to scoop out the avocado onto the bread. This avocado toast wont win any beauty pageants, you’ll probably need to add an avocado rose or two if that’s your goal, but the chunky consistency with just a hint of lemon and garlic is just perfect.

Finally, I finish the toast off with a generous dusting of garlic powder, sprinkle of lemon juice, and salt to taste (usually a crank or two of a salt grinder).

If using Tofurky, which I highly recommend, I like to tear it into large pieces and drape on top of the toast. I like to crumble tofu on tempeh on top and press it into the avocado so it stays put.

Sometimes Luke likes to drizzle hot sauce on top, but I can’t condone that behavior :P.

So there you have it- avocado toast my way. It’s super simple to make, and always satisfying. If you try out this recipe, or have any avocado toast variations you recommend, do let me know! I’m always looking to improve my avocado toast game.

P.S. Thank you Luke for the lovely in-action avocado toastin’ shots!

Vegan Cinnamon Rolls

Back in college, Wednesdays were not just Wednesdays. They were Cinnamon Roll Wednesdays. The dining hall would open for service at 5:30 pm, but the really draw of the night, freshly baked cinnamon rolls still glistening with melted frosting, began at 6:15. At around 6, a line would start worming around the dining hall as stressed out students waited impatiently for a brief (but sweet) respite from problem sets and exams.

To be honest, I hardly ever waited in line. I’m very very serious about cinnamon rolls, and to be perfectly honest, after trying them during the first week of classes, I determined they were nothing to write home about. These babies? These babies however deserve your full and undivided attention.

‘ve made cinnamon rolls a few times, and I’ve always found it to be a very therapeutic process. My top advice, which I’ve learn over the years is:

  1. Chill the dough before rolling it out. Room temperature dough + soft butter is a nightmare to roll and slice. While chilling the dough requires an extra step, it ensures (relatively) pretty cinnamon rolls.
  2. Cut the cinnamon rolls with a bread knife. I’ve seen tricks for cutting cinnamon rolls with dental floss and the like, but ultimately I’ve found that using a nice bread knife gives the cleanest cuts.
  3. Mark out individual cinnamon rolls on your rolled dough before you cut them. A standard size cake or pie pan will fit 7 cinnamon rolls. If you mark out individual cinnamon roll notches first, you won’t end up with unevenly sized cinnamon rolls (which I definitely had).
  4. Roll out the dough on parchment paper. Good cinnamon roll dough will be at least slightly tacky (to ensure they’re soft and tender post-bake), so it really helps to roll out the dough on parchment paper (that’s dusted with a thin layer of flour). Plus, when you roll up the dough, the parchment paper gives you a lot more ease and flexibility.
  5. Let them cool for at least 10 minutes before topping with glaze. You want the glaze to melt a bit, but not too much that it completely dissolves on the rolls.

So, friends, there you have it. Cinnamon rolls. Well, vegan cinnamon rolls (which basically means butter is swapped for vegan butter, so they don’t actually taste much, or really any, different).

I’m a big proponent of cream cheese on cinnamon rolls, but for these I stayed true to traditional cinnamon rolls and made a simple powdered sugar glaze. I ate these while watching the World Cup game with my friend, and after doing the right thing for my health and giving most of them away, ate any leftovers for the next few breakfasts/dessert.

Don’t tell anyone I told you this, but I might have fried a leftover cinnamon roll in more butter and topped it with ice cream and coconut whipped cream. Shhh, that’ll be our little secret.

Vegan Cinnamon Rolls

Dough

Filling

Icing

  1. In a large bowl, whisk together the almond milk, melted butter, sugar, and instant yeast.
  2. Add 5 cups of flour and the salt, and stir together until a shaggy dough forms. Cover the bowl with a kitchen towel and set aside in a warm place until doubled in size, about an hour.
  3. Knead the dough in the bowl until smooth, around 15-20 minutes, adding up to 1/2 cup extra flour as needed. The dough should be tacky, or even slightly sticky, but not wet. In other words, it might stick to your fingers or the bottom of the bowl a bit, but you should be able to easily knead it.
  4. Once smooth, cover the bowl with plastic wrap and refrigerate for at least 2 hours, preferably overnight.
  5. Once the dough has chilled, generously butter 2 cake or pie pans with a half tablespoon of butter, each.
  6. Remove the chilled dough from the bowl and place on a large piece of parchment paper that has been lightly dusted with flour.
  7. Roll out the dough into a 1/2 inch thick rectangle.
  8. Spread the softened buttered on the dough, and sprinkle evenly with cinnamon and brown sugar.
  9. Roll up into a log, and pinch the seam closed. I like to keep the seam on the bottom to help keep the roll intact. I prefer to roll up the dough on its shorter side to create fatter cinnamon rolls with more “twists”, but that’s a personal preference. The dough is soft, so you want to work quickly while it’s still cold.
  10. With a sharp bread knife, cut the log into 14 pieces and place 7 in each of the pans. For aesthetic purposes, you can cut off the ends of the logs and discard, but I prefer to cut the entire log into 14 pieces, and then place the ends upside down in the cake pans. This tends to take care of any aesthetic concerns.
  11. Cover the pans with plastic wrap and set aside in a warm place to rise for 30 minutes.
  12. Meanwhile, preheat your oven to 350 degrees.
  13. After 30 minutes, remove the plastic wrap and bake the cinnamon rolls for 25-30 minutes. They should be golden brown on top, but still soft and tender (but not doughy) inside. If they are browning too fast, cover the pans with aluminum foil for the remainder of the bake time.
  14. Remove the cinnamon rolls from the oven and set aside to cool. Meanwhile, whisk together the glaze ingredients.
  15. When the cinnamon rolls have cooled off about 10-15 minutes, drizzle with glaze. I use about three fourths of the glaze, but how much you use is up to you and your sweetness preferences.
  16. Enjoy warm, with a steaming side of almond milk or coffee!